Showing posts with label chocolate. Show all posts

Wednesday, February 12, 2014

Chocolate and Raspberry Mousse Cake


It is the month of luuuurve and you will fall in love with this Chocolate and Raspberry Mousse Cake! This cake is so decadent which makes it perfect for sharing ;). If you are like me however and have a partner that doesn't 'believe' in Valentines day, you can make this cake and eat it all yourself!


I made two versions of this cake, one that is just mousse and raspberries inside a type of thin sponge cake and the other is layers of sponge, ganache, cream and mousse. Both are devine and use the same ingredients, it's up to you really to do whatever layers you want, get creative!


This recipe comes from my advanced bread and pastry text book that I received during my apprenticeship. It has been a great reference for me for reliable recipes and has introduced me to many new desserts and sweets. I have tagged many recipes to try and hopefully I will get around to all of them one day.


Chocolate and Raspberry Mousse Cake

Adapted from Advanced Bread and Pastry by Michel Suas

What you will need


For the Biscuit Viennois
110g almond meal
110g icing sugar
50g egg yolks (approx 3 egg yolks)
90g eggs (approx 2 eggs)
200g egg whites (approx 6 egg whites)
20g sugar
45g cake flour
45g plain flour

For the Chocolate Mousse
300ml light cream
300g dark choc
90g egg yolks (approx 5)
90g sugar
30ml water
300ml heavy cream

Frozen raspberries
Cocoa for dusting

What you will need to do


To make the biscuit viennois, preheat oven to 200*C and prepare two baking trays with baking paper. Sift together the almond meal and icing sugar. Add the egg yolks and whole eggs, whip on high speed until tripled in volume. In a separate bowl beat the egg whites and add sugar to make a medium stiff meringue. Fold the meringue into the whole egg mixture and fold in the sifted flours. Divide the mixture between the two trays and spread out evenly. Bake for about 7 minutes. Once baked, flip the sponges onto new pieces of baking paper and remove the old baking paper.

To make the chocolate mousse, make a ganache with the light cream and chocolate by bringing the cream to the boil then pouring over chocolate. Stir the ganache until smooth then set aside. Dissolve the sugar in the water and cook in a saucepan to 121*C. While it is cooking, begin whipping the egg yolks. Slowly add the sugar syrup to the yolks and whip on a medium-high speed until cool to the touch. Whip the heavy cream to soft peaks. Add the egg yolk mixture to the ganache (which should be a similar temperature) then fold in the cream gently.

To assemble, cut out four strips of biscuit viennois to line four small loose bottomed cake tins (cheesecake tins). Cut out four circles the size of the bottom of the cake tins. Line the tins with the sponge and place a circle in the bottom of each. Half fill each tin with chocolate mousse. Place a layer of raspberries on top of the mousse then cover with another layer of mousse. Make sure the mousse is divided equally amongst the tins, if you have any excess biscuit viennois protruding the top just trim it off so that it is flush with the top of the mousse. Refrigerate over night.

When ready to serve, remove from tin and sprinkle with cocoa. You can add some raspberries for decoration too.


Monday, February 3, 2014

Black Forest Cheesecake


I am right back in the swing of things with this ridiculously rich and completely indulgent Black Forest Cheesecake. Confession time, this recipe is straight from Brown Eyed Baker and they only just published it last week. It popped up in my inbox and I immediately HAD to make it!


I may have slightly undercooked the cheesecake as it is very soft in the middle, but it has a mousse-like texture that is just divine. The dark chocolate makes the filling very rich, you can change it to milk chocolate if you prefer something a bit sweeter. The whipped cream is a little different too in that it contains cream cheese. I think this gives it a more stable quality and does not melt as easy. Enjoy this bad boy in moderation!


Black Forest Cheesecake

Adapted from Brown Eyed Baker

What you will need


For the crust
24 Oreo cookies
¼ cup unsalted butter, melted

For the filling
280g dark chocolate, chopped
900g cream cheese, at room temperature
1 1/2 cup sugar
¼ cup cocoa powder
4 eggs, at room temperature

For the cherry topping
600g bottled cherries
¼ cup sugar
Pinch of salt
2 tablespoons cornflour
1 tablespoon lemon juice

For the whipped cream
100g cream cheese, at room temperature
¼ cup granulated sugar
¾ teaspoon vanilla extract
1 cup heavy cream

What you will need to do


Preheat oven to 180*C. Prepare a cheesecake tin by lining the bottom with baking paper and spraying the sides lightly with oil. Place the Oreo cookies into a food processor and pulse until they resemble fine crumbs. Add the melted butter and pulse until all combined. Press the mixture evenly into the base of the cheesecake tin and bake for about 8 minutes until the crust is set. Remove from oven and place on a cooling rack to cool down.

To make the filling, place the dark chocolate over a double boiler until melted then set aside to cool. Place the cream cheese into the bowl of a stand mixer and using the paddle attachment beat until soft. Add the sugar and cocoa powder and beat until light and fluffy. Gradually add the eggs to the mix beating well after each addition and scrapping down the sides every now and then too. Add the chocolate and mix until use combined. Pour the mixture over the base and smooth the top. Bake for about 1 hour or until the top of the cheesecake looks dry and there is still a bit of a wiggle in the middle. Once cooked, turn oven off, remove cheesecake and let cool to room temp on a cooling rack. Place cheesecake in fridge to chill overnight (or at least a couple of hours if you can resist it).

To make the Cherry topping, lightly drain cherries but reserve 1/4 cup of the juice. Place cherries in a saucepan with sugar and salt and cook, stirring occasionally, until starting to boil. Whisk the reserved juice with the cornflour and add it to the saucepan. Stir until thickened then remove from heat and stir in lemon juice. Let the mixture cool before putting it into an airtight container and storing it in the fridge until needed.

[NOTE: I would make the whipped cream when you are ready to assemble the cheesecake]
To make the whipped cream, place the cream cheese in the bowl of a stand mixer and beat until soft. Add the sugar and vanilla and beat until well combined. Slowly add the cream and whisk on high until stiff peaks form.

To assemble the cheesecake! Remove the cheesecake from the fridge. Run a knife around the edge of the tin and remove the cheesecake from the tin. Place on a serving plate. Fill your piping bag with the whipped cream and pipe around the outside edge of the cheesecake. Spoon your cherry mixture into the middle of the cheesecake. Enjoy!


Wednesday, October 30, 2013

Nanaimo Slice


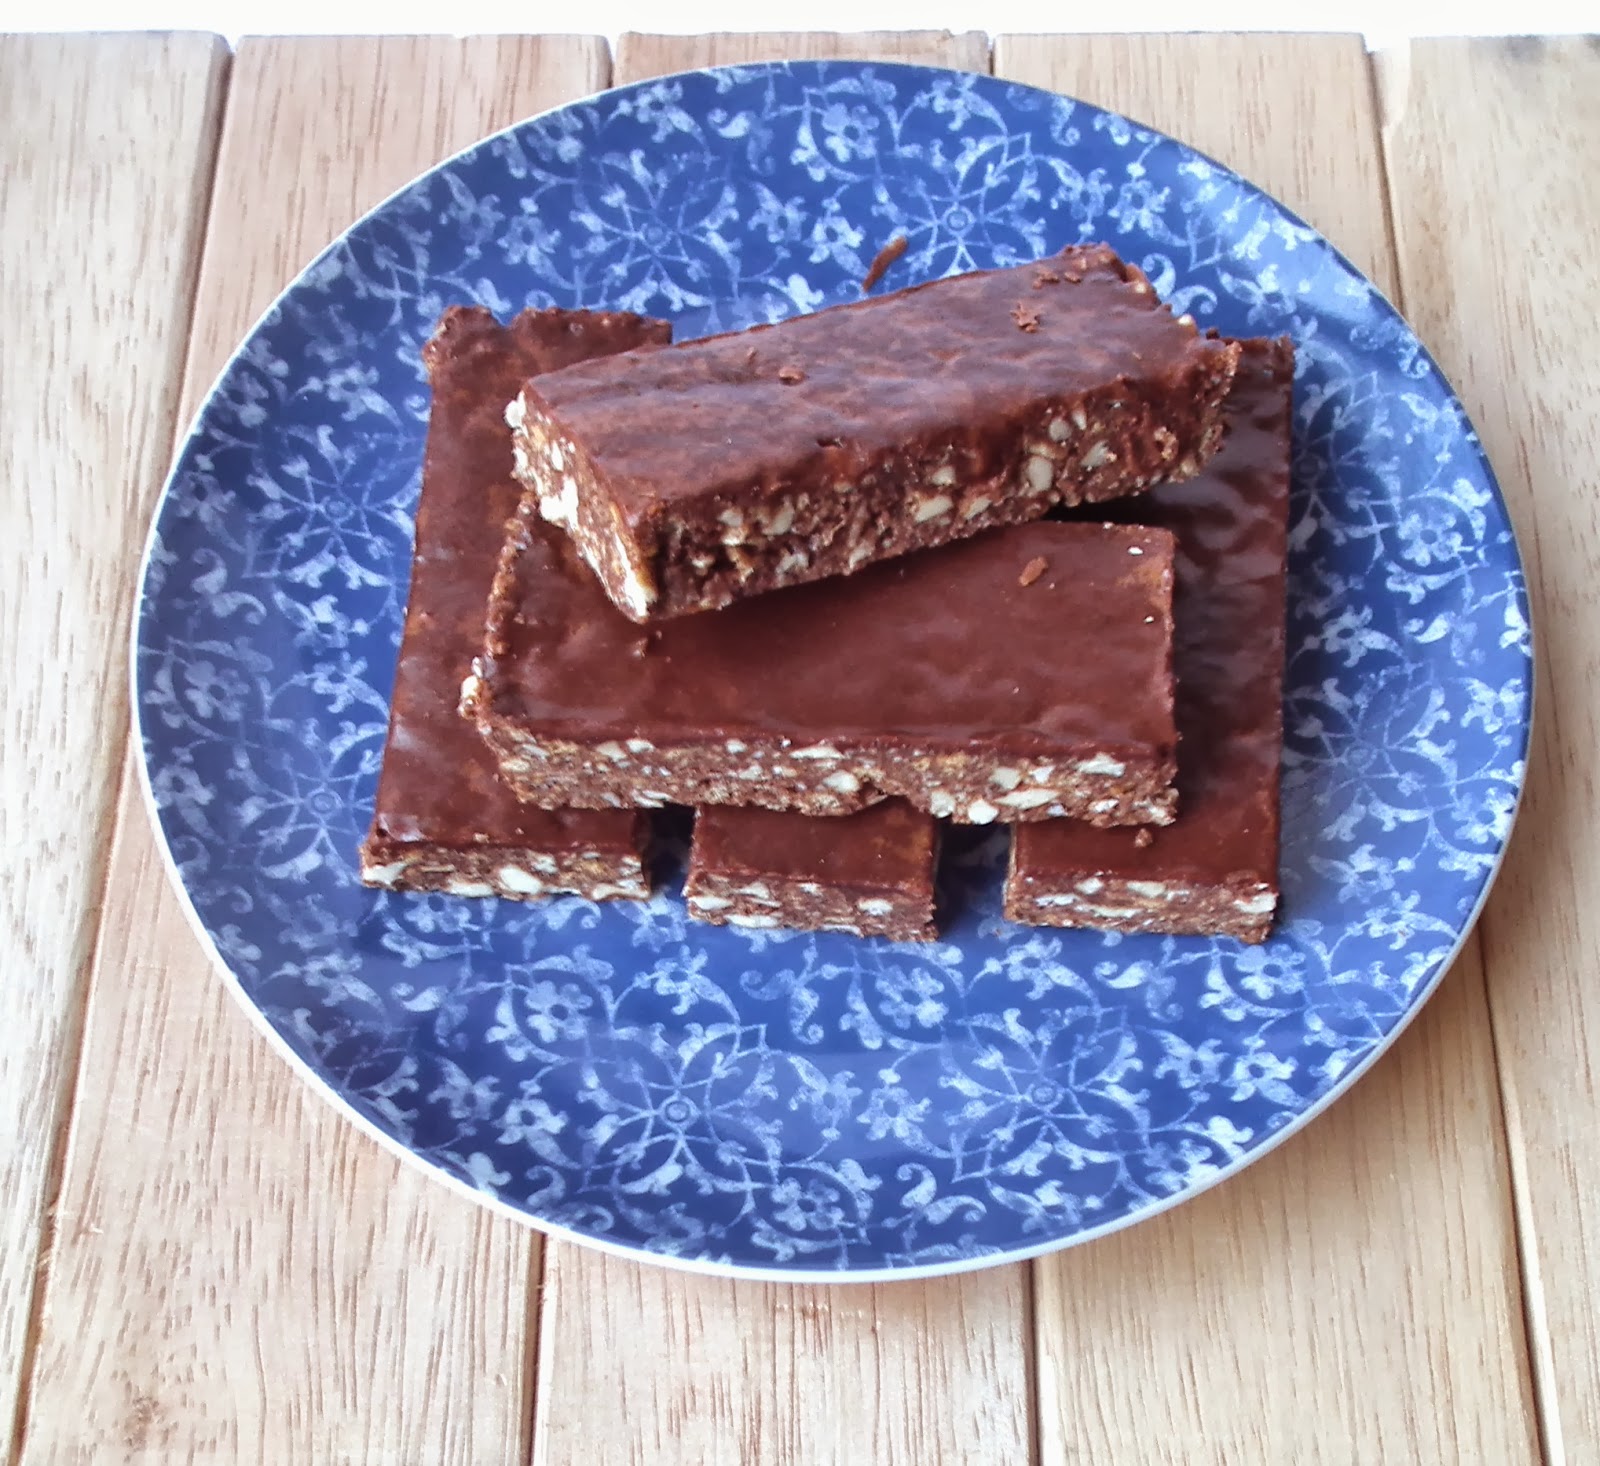
I have been wanting to make this slice for some time now, ever since I tasted it at a local cafe. It is a canadian treat and I had never even heard about it until recently. This no-bake slice is made up of three layers. The first is a chocolatey, nutty, coconut, biscuit crumb base not dissimilar to chocolate slice or a cheesecake base. The middle layer is a custard flavoured buttercream filling and the final layer is a chocolate ganache. 


Richness overload! It is very sweet and indulgent. I probably could have halved the filling in the middle to make it less of a heart-attack-inducing treat. So I ticked this off my bucket list of baked goods (well technically no-bake) and put it on my "stuff to try for realsies list". Now that I have made them myself, I look forward to trying these treats IN Nanaimo, Canada...one day.


Nanaimo Slice

Adapted from I Wash You Dry

What you will need


For the base
1/2 cup butter, room temperature
5 tbsp cocoa powder
1/2 cup sugar
1 tsp vanilla
1 egg, lightly beaten
1 1/2 cups plain biscuits processed to crumbs (you can use gluten free biscuits)
1/2 cup chopped walnuts
1 cup desiccated coconut

For the filling
1/2 cup butter, room temperature
2 tbs custard powder
3 tbsp cream
2 cups icing sugar

For the topping
115g milk or dark chocolate
3 tbsp butter
2 tbsp cream

What you will need to do


Prepare a slice tin by lining it with baking paper and set aside. Set up a  heatproof bowl over a saucepan of simmering water making sure not to let the bowl touch the water. Place the butter, cocoa, sugar and vanilla in the bowl and whisk until melted and sugar is dissolved. Remove the bowl from the saucepan and quickly add the egg and whisk until combined. Return the bowl to above the saucepan and stir cooking for another 2 minutes. Remove from heat and add the crushed biscuits, walnuts and coconut. Mix until all combined then press into the prepared tin. Place in the fridge to set.

To make the filling, beat the butter, custard powder and cream in a bowl until light and fluffy. Gradually add the icing sugar until light and fluffy and sugar has dissolved. Spread out over the base and return to the fridge.

To make the topping, place the chocolate butter and cream in a heatproof bowl and place over the saucepan of simmering water just like for the base. Stir until melted and smooth. Remove bowl from the saucepan and leave to cool for about 10 minutes. Pour chocolate mixture over the top of the slice and spread out. Return to the fridge until the chocolate has set. Remove from fridge and slice into pieces.


Wednesday, October 9, 2013

Chocolate and Pomegranate Brownie Slice


I don't know about you, but I'm starting to feel the Christmas spirit already. I know it's only October and Christmas is still ages away, but there's just something screaming Christmas at me lately. I think it has to do with the weather, it's getting hotter and certain trees are flowering and the distinct smell of Christmas is just starting to come about here and there. Don't worry I'm not posting a Christmas recipe this week...but just be aware that they might start popping up soon.


This brownie slice is so decadent. I thought I would try something a little different by making pomegranate cream and it might need a little tweaking still but it is still very delicious and goes well with the chocolate brownie. I found the pomegranate cream recipe on Pinterest from a blog called A Spicy Perspective in a recipe for Chocolate and Pomegranate Petit Fours. I would like to try the whole recipe one day.


Chocolate and Pomegranate Brownie Slice

Adapted from A Spicy Perspective

What you will need


For the brownie
130g butter
340g dark chocolate
1 1/4 cup sugar
1tsp vanilla
3 eggs
1/2 cup flour

For the pomegranate cream
230g unsalted butter, softened
1 cup sugar
1 cup pomegranate juice
¼ cup flour

For the chocolate ganache
100g chocolate
50ml cream


What you will need to do


Preheat oven to 175*C and line a large rectangle tin with baking paper.
In a small saucepan melt the butter and chocolate over low heat. Stir until melted. Take off the heat and add the sugar and vanilla, stir until combined. Beat in eggs one at a time. Add the flour and mix rigorously for a whole minute until it becomes smooth and glossy and pulls away from the side of the pan a bit. Apparently this step is crucial to getting the right texture at the end. Pour batter into prepared tin. Bake for 30 minutes or until the centre feels almost set. You do not want to over cook them. Take out of oven and cool in the tin. Place in the fridge to cool.

For the pomegranate cream, place the pomegranate juice and flour in a small saucepan and whisk so there are no lumps. Place over medium heat and whisk until the mixture boils. Whisk until the mixtures becomes a thick paste. Place in the fridge to cool. Meanwhile beat the butter and sugar until fluffy and glossy. Add the cooled pomegranate mixture and beat for 5 minutes until fluffy.

Take the brownie out of the tin and cut in half to produce two identical slabs. Spread the pomegranate cream over one slab and then place the other one on top. Press down slightly.

To make the ganache. Place the cream and chocolate in a small saucepan and melt over low heat, stirring constantly. Leave to cool and thicken slightly and then spread over the tops of the brownie slice. Cut into small squares to serve.


Saturday, September 28, 2013

Hedgehog Slice


My first encounter with Hedgehog slice was through a friend at school whose mum used to make it for her school lunch. I tried it one day and absolutely loved it! It was probably the first time I had asked someone for their recipe. Her slice was a bit different to this one, it wasn't chocolate and I think it had almonds in it and a layer of chocolate over the top. I can't actually remember if I ended up making her version even after getting the recipe, but I just recently started to think about it again.

I had a left over packet of biscuits from another baking session and thought I should give it a go. I had some cashews on hand and thought they would be a nice addition and they really were! They make it taste a little more sophisticated. I would have liked to make a pure chocolate layer over this slice but I was making this with things I already had in the pantry and so I just made a quick chocolate glaze icing.


Hedgehog Slice

Adapted from KidSpot

What you will need


1 packet plain biscuits (I used Malt biscuits)
1 cup cashews
150g butter
150g sugar
1 egg
1/4 cup cocoa
1/2 cup coconut
1 tsp vanilla

For the icing
1/2 cup icing sugar
1 tsp butter
1 tbsp cocoa
Water


What you will need to do


Prepare a slice tin by lining it with baking paper. Place the butter and sugar in a small saucepan and stir over low heat until the butter has melted. Set aside to cool.

Crush the biscuits and cashews in a food processor. Try to leave some larger chunks. Place in a bowl and add cocoa and coconut. Stir to combine.

Add egg and vanilla to butter mix and stir in quickly. (Note - if your mixture is still hot the egg will cook and not mix in, if this happens, strain the mixture to remove and bits of cooked egg.) Add to the biscuit mixture and stir until well combined. Place mixture into prepared tin, spread out evenly and press down. Place in the fridge to set, may take a couple of hours.

To make the icing, sift the icing sugar and cocoa in a small bowl, add the butter and mix to combine. Slowly add water to reach a smooth and spreadable consistency. Spread over the top of the slice and return to fridge to set.


Saturday, July 13, 2013

Chocolate Brownies - My New Favourite!


I hadn't cooked with chocolate for a while and I was having withdrawals. I wanted to make something to take to a friends place for a BBQ and thought brownies would be perfect. But I decided to try a new recipe (risky I know) because there was still this certain brownie texture that had alluded me up until now. That dense and almost chewy texture as apposed to super moist cake-like texture. I had a good feeling about this new recipe.


In the past I had always tried to use brownie recipes that use cocoa powder instead of chocolate for convenience reasons but this time I went for the real thing. These brownies are amazing! They are exactly that texture I have been searching for and the nuts just really add to the experience. Topped with chocolate ganache they are to die for and extremely morish. Another great thing is you make it in one saucepan so its not too messy!


It is safe to say that when I open my own bakery, these babies will DEFINITELY be on the menu! I found the recipe floating around on Pinterest and it is a David Lebovitz recipe. I am really starting to like this guys recipes... a lot!


Chocolate Brownies

Adapted from Leite's Culinaria

What you will need


85g butter
225g dark chocolate
3/4 cup sugar
1tsp vanilla
2 eggs
1/4 cup flour
1/2 cup walnuts, chopped
1/2 cup pecans, chopped

200g dark chocolate
100ml cream

What you will need to do


Preheat oven to 175*C and line a square baking tin with baking paper.
In a small saucepan melt the butter and chocolate over low heat. Stir until melted. Take off the heat and add the sugar and vanilla, stir until combined. Beat in eggs one at a time. Add the flour and mix rigorously for a whole minute until it becomes smooth and glossy and pulls away from the side of the pan a bit. Apparently this step is crucial to getting the right texture at the end. Stir in the chopped nuts and pour batter into prepared tin. Bake for 30 minutes or until the centre feels almost set. You do not want to over cook them. Take out of oven and cool in the tin.

To make the ganache. Place the cream and chocolate in a small saucepan and melt over low heat, stirring constantly. Once melted, pour over the top of the brownies still in the tin and leave to set. I put mine in the fridge to set quicker :D.


Sunday, June 9, 2013

Pistachio Macarons with Chocolate Ganache and Vanilla Buttercream


It has been a while since I have made macarons. These turned out surprisingly well considering I tampered with the ingredients from my usual recipe and just added however much I wanted of pistachios. In fact the measurement of pistachios was 'however many I could peel before I got bored/annoyed/sore fingers'. I had intended to add some green food colouring to give them a more 'Pistachio' look but it completely escaped me. The ganache and buttercream was just left over from some cupcakes I made but it was super delicious sandwiched between pistachio macarons.


I've not been having a great time at work lately which is a shame because I love what I do. Throw in a bit of home sickness and my mood has been somewhat unpleasant to say the least. These little pick me ups make me feel a whole lot better both in the making and the eating. Creating these delicious little morsels from a few simple ingredients just gives me hope that one day this will be what I get to do day in day out :) And the fact that just one little bite can lift my mood to new heights is a pleasurable bonus!


Pistachio Macarons with Chocolate Ganache and Vanilla Buttercream


What you will need


3/4 cup almond meal
3/4 cup icing sugar
1/4 cup ground pistachios (I peeled/ shelled some pistachios then processed and sifted them, keep the bits that were too big to get through the sieve and set aside for later)
1/4 cup caster sugar
2 egg whites

200g chocolate melts
100ml cream

1 cup icing sugar
100g butter
2 tsp vanilla essence


What you will need to do


Prepare two baking trays with baking paper and set aside.
In a bowl sift the almond meal, icing sugar and ground pistachios and set aside. In another bowl beat the egg whites until soft peaks form. Add the caster sugar and beat until a thick merengue forms. Add the merengue into the sifted dry ingredients. Start mixing quite vigorously to combine ingredients and then fold until mixture is shiny and moves slowly in the bowl when tilted.

Place mixture into a piping bag fitted with a round tip about 1cm wide. Pipe small rounds onto the baking trays about 2cm wide (I made some extra small ones about 1cm wide too). Leave a good sized gap between each round as they will spread slightly. Tap the baking tray quite hard onto the bench to get any bubbles out of the rounds. Sprinkle the rounds with any leftover pistachio bits that were too big to get through the sieve. Leave the trays out on the bench for anywhere from 30 minutes to 2 hours, depending on the temperature and weather, until a dry skin forms on the rounds and you can touch them without it sticking to your finger.

Preheat the oven to 150*C and place trays in for about 10 minutes. They may need longer depending on your oven. The shells will be ready when the feet have formed and no longer look soft. They won't brown too much on top but the bottoms might just start to brown. Take out the trays and leave them to cool down on the tray. Once they are cool to touch remove them carefully from the baking tray and set on a wire rack to continue to cool.

To make the ganache, bring the cream to boil then pour over the chocolate in a heat proof bowl. Stir until all the chocolate has melted then set aside to cool down and firm up.

To make the buttercream, beat the butter and icing sugar until pale and creamy. Beat in the vanilla.

To fill the macarons, prepare a piping bag fitted with a round tip about 1cm wide. To fill the piping bag, holding it upright put the buttercream on one side of the bag and put ganache on the other side. This way you will get a swirled effect when you pipe. Pipe the filling onto half of the shells and then sandwich together with the other shells.

Wednesday, May 29, 2013

Choc-Peppermint Cake and Cupcakes


Peppermint isn't exactly my favourite flavour but with chocolate it's not so bad. Chocolate makes everything better really! I made this cake for a work friends birthday and wasn't around for the cutting of it hence no inside photos :( 

I used XXX Mints to flavour the icing and I put choc bits in it to give it a kind of choc-chip look, so I promise that's what the black bits are, not cake crumbs.

The chocolate cake recipe I used was one that has oil and vinegar instead of milk, butter and eggs. A bit different but I thought I would give it a go. The result was a dark moist chocolate cake and although there is 2 cups of sugar in it (!) not overly sweet (I think the cocoa has something to do with that). 

I decided to whip up some cupcakes and mini cupcakes as the recipe was quite large and my cake was small. They didn't take long to cook and came up beautifully!


Choc-Peppermint Cake

Recipe adapted from About.com

What you will need


2 1/2 cups plain flour
1/2 cup corn flour
2 cups caster sugar
Pinch of salt
2 tsp baking soda
10 tbsp cocoa
2 tsp vanilla
3/4 cup oil
2 tbsp vinegar
2 cups cold water

2 cups icing sugar
250g butter, room temperature
1 packet of XXX mints
Green food colouring
1/2 packet Choc Thins
Crushed Flakes for decoration

What you will need to do

Preheat oven to 180*C and prepare your tins and trays. I used one 4 inch mini springform cake tin, 20 cupcake papers and 24 mini cupcake papers but you could just make one large slab cake if preferred.

Sift all dry ingredients into a bowl. In a separate bowl place the vanilla, oil, vinegar and water. Add the wet ingredients to the dry and mix slowly until combined. Once combined, beat mixture until smooth. Fill cake tin and cupcakes 3/4 full. Bake cake for about 30-40 minutes until top springs back when touched. The cupcakes will take around 20-30 minutes and the mini cupcakes will only take about 8minutes.

Remove from oven and allow to cool. Meanwhile to make the icing, beat the icing sugar and butter together until light and creamy. Crush about 4 XXX mints until powdery and add the the icing. You can add more mints depending on how strong you want the flavour. Add a drop of green food colouring and beat. Add as much or as little until you reach your desired shade of green. Add the Choc Thins and mix until combined.

When the cake has cooled, slice into two halves. Place a dollop of icing on one half and spread it out. Place the other half of the cake on top and cover with icing. Place crushed Flakes on top for decoration. For the cupcakes, simply place remaining icing into a piping bag fitted with a round tip and pipe onto tops. You can sprinkle with some extra Choc Thins for decoration.


Saturday, March 30, 2013

Cookies and Cream Easter Eggs


Alright well I decided to not be lazy and got my Easter egg moulds out of storage to have a go at some home made Easter eggs. Honestly they are not very hard to make however they do require some patience... something I often lack when baking. The process is easy, melt the chocolate (and attempt to temper it :S) fill the moulds and wait. Once the chocolate around the edges has set, pour or scoop the chocolate out of the middle and you are left with an even shell. But if you are me, you half fill the moulds, swirl them around the edges until there is a thin layer of chocolate over the whole mould then pour out any excess. This way you end up with a mould that has a thick bottom and tapering thin sides... not ideal. 


I wanted to make a delicious rocky road inspired cookies and cream filling for the eggs and I think I did pretty good. Inside the white chocolate eggs is a mix of Milky Bar Cookies and Cream chocolate, Oreo biscuits, marshmallows and a bit more white chocolate for good measure. I decided the leave it pretty chunky and not melt down the cookies and cream chocolate bar so that you didn't feel like you were biting into a completely solid egg. Instead it is more something you can pick at and pull apart.


On another note I would like to point out that I am pretty much an official food blogger now that I have purchased and used striped paper straws in one of my shoots! Just about every blog I read has used these before and I have finally given in to their retro-cuteness factor. Now all I need is some rustic timber boards to style my photos on and I am a bonafide food blogger :) (er and maybe some more lessons in actual photography :S)

HAPPY EASTER EVERYONE!


Cookies and Cream Easter Eggs

Makes about 5

What you will need


1 bag Nestle white chocolate melts
1 bar Milky Bar Cookies and Cream chocolate
1 bag marshmallows, white ones only
1 packet of Oreo biscuits

Easter egg moulds

What you will need to do


Place 3/4 of the packet of melts into a microwave safe dish. Melt in 30 second intervals stirring after each. After all the chocolate has just melted, put the rest of the chocolate into the bowl and stir until all has melted.

Rest Easter egg moulds in a container so that they will not roll over. Pour chocolate into the mould to fill. Leave out or put into fridge until a 5mm rim has set around the outer edge. Pour or scoop the unset chocolate out of the middle and back into the bowl. Place mould back into fridge to set firm. If you have multiple moulds continue doing this until you make about 5 eggs (well half eggs). If you only have one or two moulds, you will have to wait until the first lot have set before removing them from the mould and repeating. You may need to heat the chocolate a bit between filling moulds as it may start to set. Just put back in microwave for 30 seconds and stir.

Once the egg has set hard, remove from mould. Just tip it upside down and gently loosen the mould. If the egg cracks, just melt the chocolate and start again. The less you handle the egg the better as it will melt from your touch.

In a separate bowl, place marshmallows, chopped up Oreo biscuits (reserve a few to place on top) and chopped up Milky Bar chocolate. Pour in any left over melted white chocolate (reserve a small amount if you want to drizzle some over at the end) and mix. Spoon mixture into the eggs gently without breaking them. Place half an Oreo on top of each and drizzle over any reserved white chocolate.


Sunday, February 3, 2013

Salted Milk and White Chocolate Chip Biscuits


All week I have been getting so excited for our trip to Perth and we are finally here! This city has impressed so far with its beautiful parks and friendly people, they even put on a fabulous fireworks display for Australia Day. In the days leading up to our departure I made about a zillion lists of things to remember to do or pack before we leave and I am proud to say my organisational OCD paid off. I managed to find time to make these deliciously sweet and salty biscuits, with the intention to keep some for the trip, but the reality that they were devoured within a few days.


The wonderful thing about these cookies is that you can really taste the salt but it only brings out the sweetness of the chocolate and makes it so much more delicious. I used to omit the salt from my chocolate chip biscuits out of pure ignorance thinking "why would anyone add such a savoury ingredient to a sweet treat?" I am a lot wiser now (but only slightly less ignorant). Try these biscuits and you will never leave the salt out of a sweet dish ever again!


Salted Milk and White Chocolate Chip Biscuits

(Recipe adapted from the Brown Eyed Baker)

What you will need

2 cups flour minus 2 tbsp
2 tbsp corn flour
1/2 tsp baking soda
1 tbsp salt
170g unsalted butter, melted and cooled until warm
1 cup packed brown sugar
1/2 cup caster sugar
1 large egg plus 1 egg yolk
2 tsp vanilla extract
1 cup milk chocolate chips
200g white chocolate cut into chunks

What you will need to do


Preheat oven to 180*C and line 2 baking trays with baking paper. Sift flours, baking soda and salt into a bowl and set aside. Beat together melted butter and sugars. Add eggs and beat until creamy. Add vanilla and flours and beat until just combined. Stir in chocolate. Take out dough and place on a large piece of plastic wrap. Wrap dough up in a log shape and place in freezer to firm up.

Once firm, remove from freezer and slice into biscuits about 2cm thick. Place on trays and bake for about 15 minutes or until slightly browned on the edges. Remove from oven and cool on trays.


Saturday, January 12, 2013

Chocolate Eclairs


For a long time now I have wanted to learn French, and this year I am making it happen. I've downloaded some great apps onto my iPad and they have been really helpful. My desire to learn French stems mostly from the fact that I really want to visit France one day and be able to communicate well there. I can't wait to experience a true French Patisserie and eat a fresh French baguette!


In the meantime, while I save for such a trip on an apprentice wage, I decided to make my own Chocolate Eclairs. I have made choux pastry before for profiteroles and found it very hard to get a consistent result. Sometimes they would be brilliant and sometimes they would crash and burn. I found a great recipe for choux pastry on Poh's Kitchen on ABC when she had Emmanuel Mollois on making his Chocolate Eclairs, they turned out perfect first go!


Chocolate Eclairs

(Recipe adapted from Poh's Kitchen)

What you will need


100g chocolate
1 egg

For the choux pastry
200ml milk
90g unsalted butter
1tsp salt
1tsp sugar
120g plain flour
3 eggs

For the chocolate cream
200ml cream
130ml milk
4 egg yolks
60g caster sugar
165g dark chocolate

What you will need to do


Preheat oven to 190*C and line two baking trays with baking paper. In a saucepan combine milk, butter, salt and sugar and bring to the boil. Take off heat and mix in flour. Place back on heat and cook stirring until mixture resembles a dry ball, about 5 minutes. Place dough into a bowl and add eggs one at a time mixing well after each addition.

Place dough into a piping bag fitted with a large round nozzle. Pipe thick lines of dough onto the baking trays whatever size you desire, leaving space between each. Lightly whisk the 1 egg and brush the tops of the eclairs. Place in oven for 30mins then turn down to 150*C and bake for a further 15mins. When done place on a wire rack to cool.

To make the chocolate cream place the milk and cream into a saucepan and bring to the boil. Whisk egg yolks and sugar together until thick and pale. Add the cream mixture and cook gently, stirring without boiling, until mixture thickens. Take off heat and stir in chocolate, set aside to cool.

Place the chocolate cream in a piping bag with a small round nozzle. Poke a small hole in the end of an eclair and pipe in the chocolate. You may need to do it from both ends to get the chocolate throughout the whole eclair. Repeat with all the Eclairs.

Melt the extra chocolate and place in a container just longer than the Eclairs. Dip the top of the eclair into the chocolate to coat. Set aside to let chocolate set.

NOTE
I am still having some trouble adjusting to my oven though so when I thought it was time to turn the heat down, I opened up and rotated the trays too. This was a mistake as some of the Eclairs flopped. I think I may have also piped some a bit thin and this contributed to some not puffing up as much as I would have liked. I was also a little impatient with the chocolate cream filling I tried filling the Eclairs when the mixture was still a bit runny and hadn't cooled and thickened enough(this was a bit messy!).


Saturday, December 15, 2012

Chocolate Sugar Cookies with Cappuccino Filling


Christmas is sooooo close and I am super excited!! I've been baking like a mad woman and still have plenty more to make. A lot of the cooking won't make it to christmas, I'm a believer in celebrating Christmas all month or else Christmas day comes and goes way too quickly. So luckily with this yummy recipe I made the dough and put half in the freezer so I can whip some up the day before I head home for Christmas, clever me :) 


These are the most delicious sugar cookies I have ever tasted (well done Sweetapolita!). I put my own twist on them by filling them with a cappuccino flavoured icing which just made them amazing. They set really hard in the fridge so it is best to serve them at room temperature when the filling has softened a bit.


Chocolate Sugar Cookies with Cappuccino Filling

Recipe adapted from Sweetapolita

What you will need

6 cups plain flour
1 1/4 cups cocoa
1 tsp salt
454g butter, softened
2 cups caster sugar
1 cup brown sugar
3 eggs
2 tsp vanilla essence

For Cappuccino Filling
2 cups icing sugar
2 tbsp butter, softened
2 tbsp cappuccino liqueur

What you will need to do 

Place butter and sugars in a bowl and beat until light and creamy. Add eggs one at a time beating well after each addition. Add vanilla essence. Sift in flour, cocoa and salt and mix slowly until combined. Blend until mixture is even and smooth.

Divide mixture into two and place one half on a lightly floured surface. Shape into a disc, wrap in glad wrap and place in the fridge. Repeat with the second half of mixture. Leave in fridge for an hour or so until mixture has firmed up.

Preheat oven to 160*C. Line two baking trays with baking paper and set aside. Take mixture out of fridge, unwrap and place on a floured surface. Using a rolling pin roll dough out to a thickness of about 10 mm. Using a cookie cutter (what ever shape you like) cut out cookies and place them on the lined baking trays. You may need to use a knife or small spatula to lift cookies off bench. To cut holes in the middle of the cookies use a large end of a piping tip (Only cut holes in half of the cookies). It is best to do this once they are already on the tray so they keep their shape better. Cook cookies in oven for about 15 minutes or until they start to crisp up on edges. Take out of oven and leave on trays for a few minutes then transfer to wire rack.

To make the filling, place icing sugar and butter in a bowl and mix on low speed until combined. Add the cappuccino liqueur and beat on high until creamy texture. If mixture is too thick, add more liqueur, if it is too runny add more icing sugar. Place filling into a piping bag and pipe filling onto the biscuits without holes. Sandwich together the biscuits with filling with the biscuits without filling. Store in refrigerator, serve at room temperature.