Friday, August 29, 2014

Sponge Cake with Fresh Cream and Strawberries


It has been too long. I would like to say that it is because I have been super busy, but that would not be 100% true. I have been a bit busy, but mostly I have been lazy and avoiding baking. Throw in a holiday to Queenstown (yay!fun!) and a dysfunctional kitchen (or lack there of) and that is all the reasons why this is the first post in several months. 

So yeah. Here is a new one!


I am making a wedding cake in a couple of weeks and the Bride and Groom have requested that one layer be a sponge cake. Having not made a sponge cake since possibly Home Economics in high school I thought I better have a practice go.

So here is a beautiful light sponge cake, so quick and easy to make, with fresh cream and strawberries! Note the photos aren't the best, it has been a while ok and the light was fading :(


Sponge Cake with Fresh Cream and Strawberries

Adapted from Taste.com


What you will need

1/3 cup plain flour
1/3 cup self raising flour
1/3 cup cornflour
4 eggs, room temperat
2/3 cup caster sugar

300ml cream
2 tsp caster sugar
1 tsp vanilla
Strawberries

What you will need to do


Preheat oven to 180*C. Line one 8 inch round pan with grease proof paper, spray with oil and dust with flour. I did all three so there was no way the cake would stick!

Sift the flours together into a bowl three times for aeration. Set aside.

Whisk eggs and sugar together with electric mixer for 6 minutes and until the mixture has tripled in volume. Gradually sift the flour mixture over the egg mixture while gently folding in with a metal spoon until just combined.

Gently pour mixture into pan and bake for 20 minutes in preheated oven. Remove from oven when sides of the cake start to come away from pan and the top springs back when touched lightly. Turn out onto cooling racks and remove baking paper. Once cooled, cut in half and fill with whipped cream and strawberries.

To make the cream, pour cream, sugar and vanilla into a bowl and whisk until starting to hold its shape. Spread evenly over first layer of sponge. Cut tops off strawberries and then in half. Arrange strawberries on the bottom layer. Place top layer of sponge over that and repeat process.


Friday, April 25, 2014

Salted Caramel Saint-Honoré Cake


The name is fancy and well so is this dessert, but its pretty simple to make each component and then all you have to do is assemble. I spied a photo of this dessert on Pinterest and although that one was a little more polished, I think mine still look pretty good.


I made four of these desserts to take to a friends place for a dinner and a an unfortunate accident lead to two of these babies landing on the floor of my car :(. Fortunately two was enough to go around the four of us, and next time I will remember to put my treats in a container and not on a plate!


Salted Caramel Saint-Honoré Cake

Adapted from Epicurious and SBS Food

What you will need


2 sheets of puff pastry

For the Choux Pastry
100g butter
150g flour

For the Salted Caramel Mousseline
Pastry cream:
2 cups whole milk
1/3 cup plus 1/4 cup sugar
5 tbsp cornflour
6 egg yolks
3 1/2 tbsp unsalted butter

9 tbsp sugar
1/8 tsp cream of tartar
1/4 cup heavy cream
1 1/4 cups chilled pastry cream (from above)
1 cup unsalted butter, room temperature
1/2 tsp sea salt
1/4 tsp vanilla
For the Chantilly Cream
600ml thickened cream
3 tbs sugar
2 tsp vanilla

For the Vanilla Glaze
1 cup icing sugar
1 tsp vanilla


What you will need to do


Start off by making the Pastry Cream for the Salted Caramel Mousseline. Bring milk and 1/3 cup sugar to a simmer in a medium saucepan, stirring until sugar dissolves. Stir cornflour and 3 tablespoons water in a small bowl to dissolve. Whisk egg yolks with remaining 1/4 cup sugar in a medium bowl. Add cornflour mixture. Gradually whisk in hot milk mixture; return to saucepan. Whisk constantly over medium heat until thick, about 2 minutes. Remove from heat. Add butter. Whisk until melted and smooth. Place in a bowl and cling wrap over the surface. Put in the fridge to cool.

Preheat the oven to 200*C. Prepare two baking trays lined with baking paper. Cut out 8 circles (about 5 inch) of the puff pastry and place on the baking trays. Prick surface with a fork repeatedly. Bake for 10-20 minutes until golden.

To make the Choux Pastry for the profiteroles, prepare two baking trays with baking paper and set the oven to 220*C. Place 250 ml water and butter in a large saucepan over medium heat and bring to just below boiling point. Remove from heat, then, working quickly to avoid lumps, add all the flour, beating with a wooden spoon. Return pan to medium heat and cook, stirring, for 1 minute or until mixture forms a ball and comes away from the side of the pan. Remove from heat and allow to cool slightly. Beat in eggs one at a time, mixing well before each addition. Pastry should be smooth, soft and just firm. Fill a piping bag with the mixture and pipe small rounds onto the baking trays. Place in oven and bake for 10 minutes until golden then reduce temperature to 180*C and bake for a further 25 minutes or until they have dried out and feel hollow. Remove from oven and set aside to cool.

To make the Salted Caramel Mousseline, stir 2 tablespoons water, sugar, and cream of tartar in a saucepan over medium-low heat until sugar dissolves. Increase heat to medium-high; boil without stirring, occasionally swirling pan and brushing down sides with a wet pastry brush, until deep amber color forms, about 7 minutes. Remove from heat; gradually add cream (mixture will bubble vigorously). Stir until any caramel bits dissolve and mixture is smooth. Let cool.

In a stand mixer fitted with a whisk attachment, beat half of the chilled pastry cream and caramel sauce at medium speed. Gradually add butter, 1 tablespoon at a time, beating until fully incorporated between additions. Beat in salt and vanilla. Scoop into a pastry bag fitted with a small tip and pipe into profiterole shells. Place in the fridge to set.

To make the Vanilla Glaze, mix the icing sugar and vanilla with enough water to created a runny glaze. Dip the tops of the profiteroles into the glaze and place back into the fridge to set.

To make the Chantilly Cream, beat the cream, sugar and vanilla in a bowl until thick and holds its shape. Place cream into a piping bag fitted with a large star nozzle.

To assemble, take one puff pastry disc and pipe a blob of cream in the middle. Take three profiteroles and place them evenly apart around the edge of the disc, supported by the cream. Pipe swirls of cream in between the profiteroles. Place one last profiterole on top.


Wednesday, March 5, 2014

Caramel Macadamia Slice


This slice rocks! I made it for my dad to take to a farewell party at his work and it was a big hit. I adore caramel and matched with a bit of chocolate and some crunchy macadamias it is such perfection. The original slice called for a layer of chocolate on top but I substituted for choc chips and I think it really worked.


And there is not much else to say except this is delicious, you should try it!


Caramel Macadamia Slice

Adapted from food.ninemsn

What you will need


1/3 cup self-raising flour
1/3 cup plain flour
165g brown sugar
50g desiccated coconut
90g butter, melted
395g sweetened condensed milk
30g butter, extra
2 tablespoons golden syrup
3/4 cup coarsely chopped macadamias
3/4 cup milk choc chips
3/4 cup caramel choc chips

What you will need to do


Preheat oven to 180*C and line a lamington pan with baking paper that extends over the sides. Sift flours and sugar into bowl, mix in coconut and butter. Press mixture evenly over base of pan. Bake 15 minutes. 
Meanwhile, stir condensed milk, extra butter and syrup in small saucepan over medium heat about 15 minutes or until caramel mixture is golden brown. Pour caramel over base and smooth with metal spatula. Press nuts into caramel with spatula. Bake 5 minutes then sprinkle both choc chips over the top and return to oven for further 5 minutes. Remove from oven and cool in tray.


Wednesday, February 12, 2014

Chocolate and Raspberry Mousse Cake


It is the month of luuuurve and you will fall in love with this Chocolate and Raspberry Mousse Cake! This cake is so decadent which makes it perfect for sharing ;). If you are like me however and have a partner that doesn't 'believe' in Valentines day, you can make this cake and eat it all yourself!


I made two versions of this cake, one that is just mousse and raspberries inside a type of thin sponge cake and the other is layers of sponge, ganache, cream and mousse. Both are devine and use the same ingredients, it's up to you really to do whatever layers you want, get creative!


This recipe comes from my advanced bread and pastry text book that I received during my apprenticeship. It has been a great reference for me for reliable recipes and has introduced me to many new desserts and sweets. I have tagged many recipes to try and hopefully I will get around to all of them one day.


Chocolate and Raspberry Mousse Cake

Adapted from Advanced Bread and Pastry by Michel Suas

What you will need


For the Biscuit Viennois
110g almond meal
110g icing sugar
50g egg yolks (approx 3 egg yolks)
90g eggs (approx 2 eggs)
200g egg whites (approx 6 egg whites)
20g sugar
45g cake flour
45g plain flour

For the Chocolate Mousse
300ml light cream
300g dark choc
90g egg yolks (approx 5)
90g sugar
30ml water
300ml heavy cream

Frozen raspberries
Cocoa for dusting

What you will need to do


To make the biscuit viennois, preheat oven to 200*C and prepare two baking trays with baking paper. Sift together the almond meal and icing sugar. Add the egg yolks and whole eggs, whip on high speed until tripled in volume. In a separate bowl beat the egg whites and add sugar to make a medium stiff meringue. Fold the meringue into the whole egg mixture and fold in the sifted flours. Divide the mixture between the two trays and spread out evenly. Bake for about 7 minutes. Once baked, flip the sponges onto new pieces of baking paper and remove the old baking paper.

To make the chocolate mousse, make a ganache with the light cream and chocolate by bringing the cream to the boil then pouring over chocolate. Stir the ganache until smooth then set aside. Dissolve the sugar in the water and cook in a saucepan to 121*C. While it is cooking, begin whipping the egg yolks. Slowly add the sugar syrup to the yolks and whip on a medium-high speed until cool to the touch. Whip the heavy cream to soft peaks. Add the egg yolk mixture to the ganache (which should be a similar temperature) then fold in the cream gently.

To assemble, cut out four strips of biscuit viennois to line four small loose bottomed cake tins (cheesecake tins). Cut out four circles the size of the bottom of the cake tins. Line the tins with the sponge and place a circle in the bottom of each. Half fill each tin with chocolate mousse. Place a layer of raspberries on top of the mousse then cover with another layer of mousse. Make sure the mousse is divided equally amongst the tins, if you have any excess biscuit viennois protruding the top just trim it off so that it is flush with the top of the mousse. Refrigerate over night.

When ready to serve, remove from tin and sprinkle with cocoa. You can add some raspberries for decoration too.


Monday, February 3, 2014

Black Forest Cheesecake


I am right back in the swing of things with this ridiculously rich and completely indulgent Black Forest Cheesecake. Confession time, this recipe is straight from Brown Eyed Baker and they only just published it last week. It popped up in my inbox and I immediately HAD to make it!


I may have slightly undercooked the cheesecake as it is very soft in the middle, but it has a mousse-like texture that is just divine. The dark chocolate makes the filling very rich, you can change it to milk chocolate if you prefer something a bit sweeter. The whipped cream is a little different too in that it contains cream cheese. I think this gives it a more stable quality and does not melt as easy. Enjoy this bad boy in moderation!


Black Forest Cheesecake

Adapted from Brown Eyed Baker

What you will need


For the crust
24 Oreo cookies
¼ cup unsalted butter, melted

For the filling
280g dark chocolate, chopped
900g cream cheese, at room temperature
1 1/2 cup sugar
¼ cup cocoa powder
4 eggs, at room temperature

For the cherry topping
600g bottled cherries
¼ cup sugar
Pinch of salt
2 tablespoons cornflour
1 tablespoon lemon juice

For the whipped cream
100g cream cheese, at room temperature
¼ cup granulated sugar
¾ teaspoon vanilla extract
1 cup heavy cream

What you will need to do


Preheat oven to 180*C. Prepare a cheesecake tin by lining the bottom with baking paper and spraying the sides lightly with oil. Place the Oreo cookies into a food processor and pulse until they resemble fine crumbs. Add the melted butter and pulse until all combined. Press the mixture evenly into the base of the cheesecake tin and bake for about 8 minutes until the crust is set. Remove from oven and place on a cooling rack to cool down.

To make the filling, place the dark chocolate over a double boiler until melted then set aside to cool. Place the cream cheese into the bowl of a stand mixer and using the paddle attachment beat until soft. Add the sugar and cocoa powder and beat until light and fluffy. Gradually add the eggs to the mix beating well after each addition and scrapping down the sides every now and then too. Add the chocolate and mix until use combined. Pour the mixture over the base and smooth the top. Bake for about 1 hour or until the top of the cheesecake looks dry and there is still a bit of a wiggle in the middle. Once cooked, turn oven off, remove cheesecake and let cool to room temp on a cooling rack. Place cheesecake in fridge to chill overnight (or at least a couple of hours if you can resist it).

To make the Cherry topping, lightly drain cherries but reserve 1/4 cup of the juice. Place cherries in a saucepan with sugar and salt and cook, stirring occasionally, until starting to boil. Whisk the reserved juice with the cornflour and add it to the saucepan. Stir until thickened then remove from heat and stir in lemon juice. Let the mixture cool before putting it into an airtight container and storing it in the fridge until needed.

[NOTE: I would make the whipped cream when you are ready to assemble the cheesecake]
To make the whipped cream, place the cream cheese in the bowl of a stand mixer and beat until soft. Add the sugar and vanilla and beat until well combined. Slowly add the cream and whisk on high until stiff peaks form.

To assemble the cheesecake! Remove the cheesecake from the fridge. Run a knife around the edge of the tin and remove the cheesecake from the tin. Place on a serving plate. Fill your piping bag with the whipped cream and pipe around the outside edge of the cheesecake. Spoon your cherry mixture into the middle of the cheesecake. Enjoy!


Monday, January 20, 2014

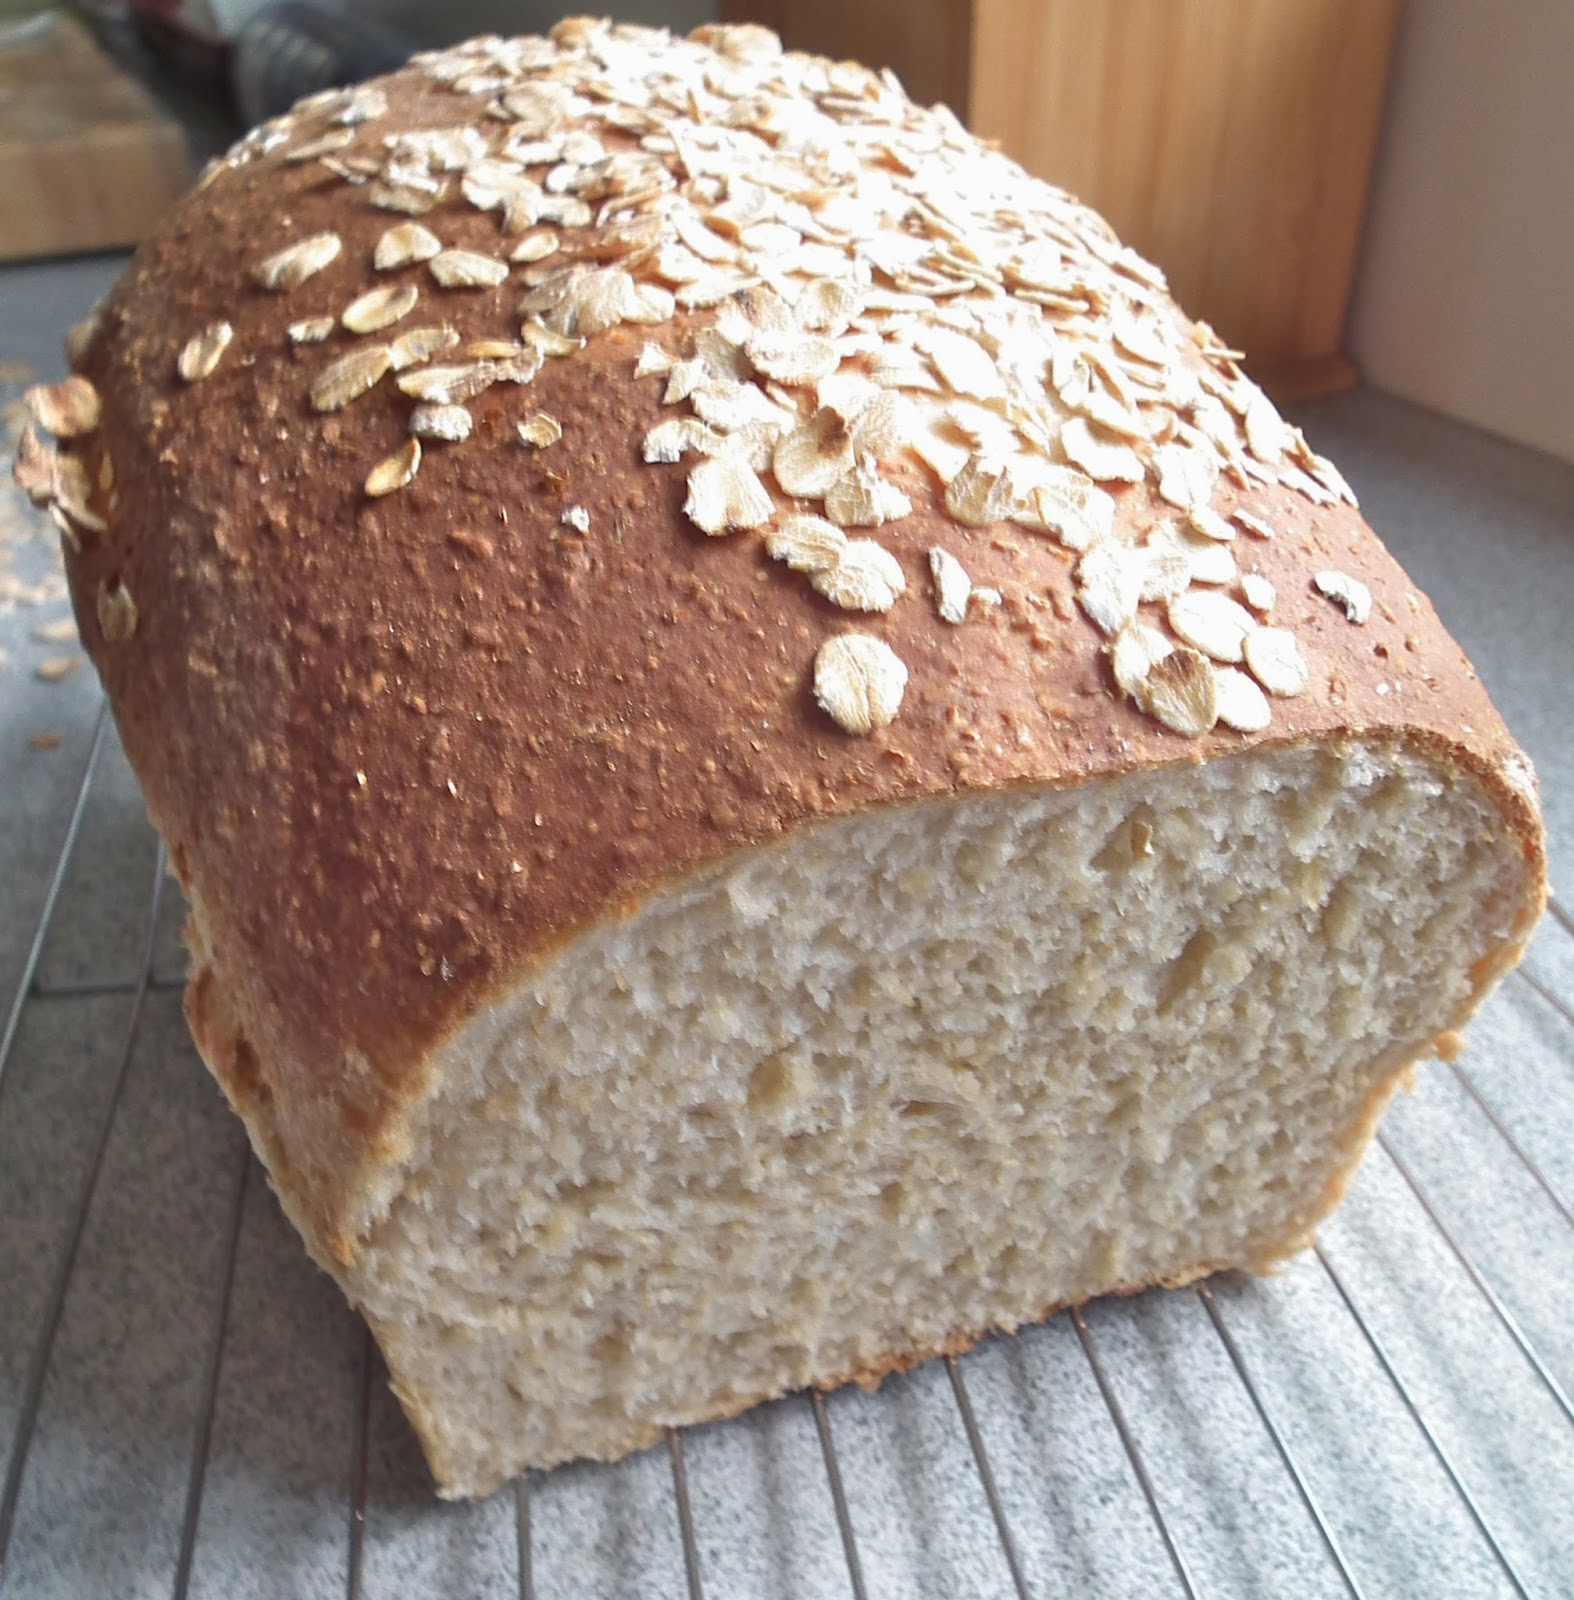
Honey and Oat Bread … I'm Back!


HAPPY NEW YEAR!! Firstly a few apologies… sorry it has been so long since I posted (moving and job hunting is NO excuse I know) and sorry for the lack of quality photos with this post, I knew the bread wouldn't last long and so I had to just take a few quick ones without a good set up.

Now that's out of the way, I hope everyone had a wonderful new year! I had a lovely surprise of a proposal from D after midnight on our 5th year anniversary so I'm still on a happy little high from that. Then we made the move back to Sarina from Townsville and have settled into my parents rumpus room to live while we save some money and decide what to do next!

Unfortunately I don't have an oven in our room so have to invade my parents' kitchen when I want to bake. Not that they complain about having delicious things to eat! So I haven't been working since Christmas and thought I should do some bread to refresh my baking passion. It worked. This recipe is amazing. This is a denser type of bread with a lovely texture and slightly sweet taste. The smells from the kitchen as it baked where heavenly, I had to try a piece straight away while it was still hot and oh my gosh, bliss.

You can easily use this bread to make sandwiches or toasties or you can just eat it. Plain and simple, bit of butter and chow down. 


Honey and Oat Bread

Adapted from GirlVersusDough

What you will need


1 cup water
1 cup milk
1 packet active dry yeast
2 tablespoons honey
2½ cups wholemeal flour
2 cups white flour
1 cup rolled oats, plus more for topping loaf
4 tablespoons oil
1 tablespoon salt

What you will need to do


Pour water and milk into a microwave-safe bowl and heat for a minute until warm. Pour into the bowl of a stand mixer. Add yeast and honey. Let sit 10 minutes until yeast is foamy. Stir in flours, oats, oil and salt. Using a dough hook, knead on low to medium speed about 8minutes until dough is smooth, elastic and still a bit sticky. Keep dough in bowl and cover with a tea towel. Let rise 1 hour until doubled.

When dough has doubled, punch down and transfer to a lightly floured surface. Knead again to make the dough come together and shape into a rectangle and roll up into a log. Transfer to a lightly greased loaf pan, seam-side down. Cover with a tea towel and let rise 30 to 40 minutes until dough reaches just higher than the edges of the pan.
Heat oven to 200*C. Lightly spray loaf with water and sprinkle oats on top of loaf. Place loaf into oven and spray the inside of the oven with water to create some steam. Bake 25 to 30 minutes until loaf is brown on top and sounds hollow when tapped on the bottom. Remove from loaf pan and transfer to a cooling rack to cool completely.